Configure VAT
If your business is VAT-registered, configure VAT once and SUQO applies it to every applicable plan automatically. Receipts will show VAT as a line item.
 [ Screenshot — VAT configuration ]
Setting the VAT rate
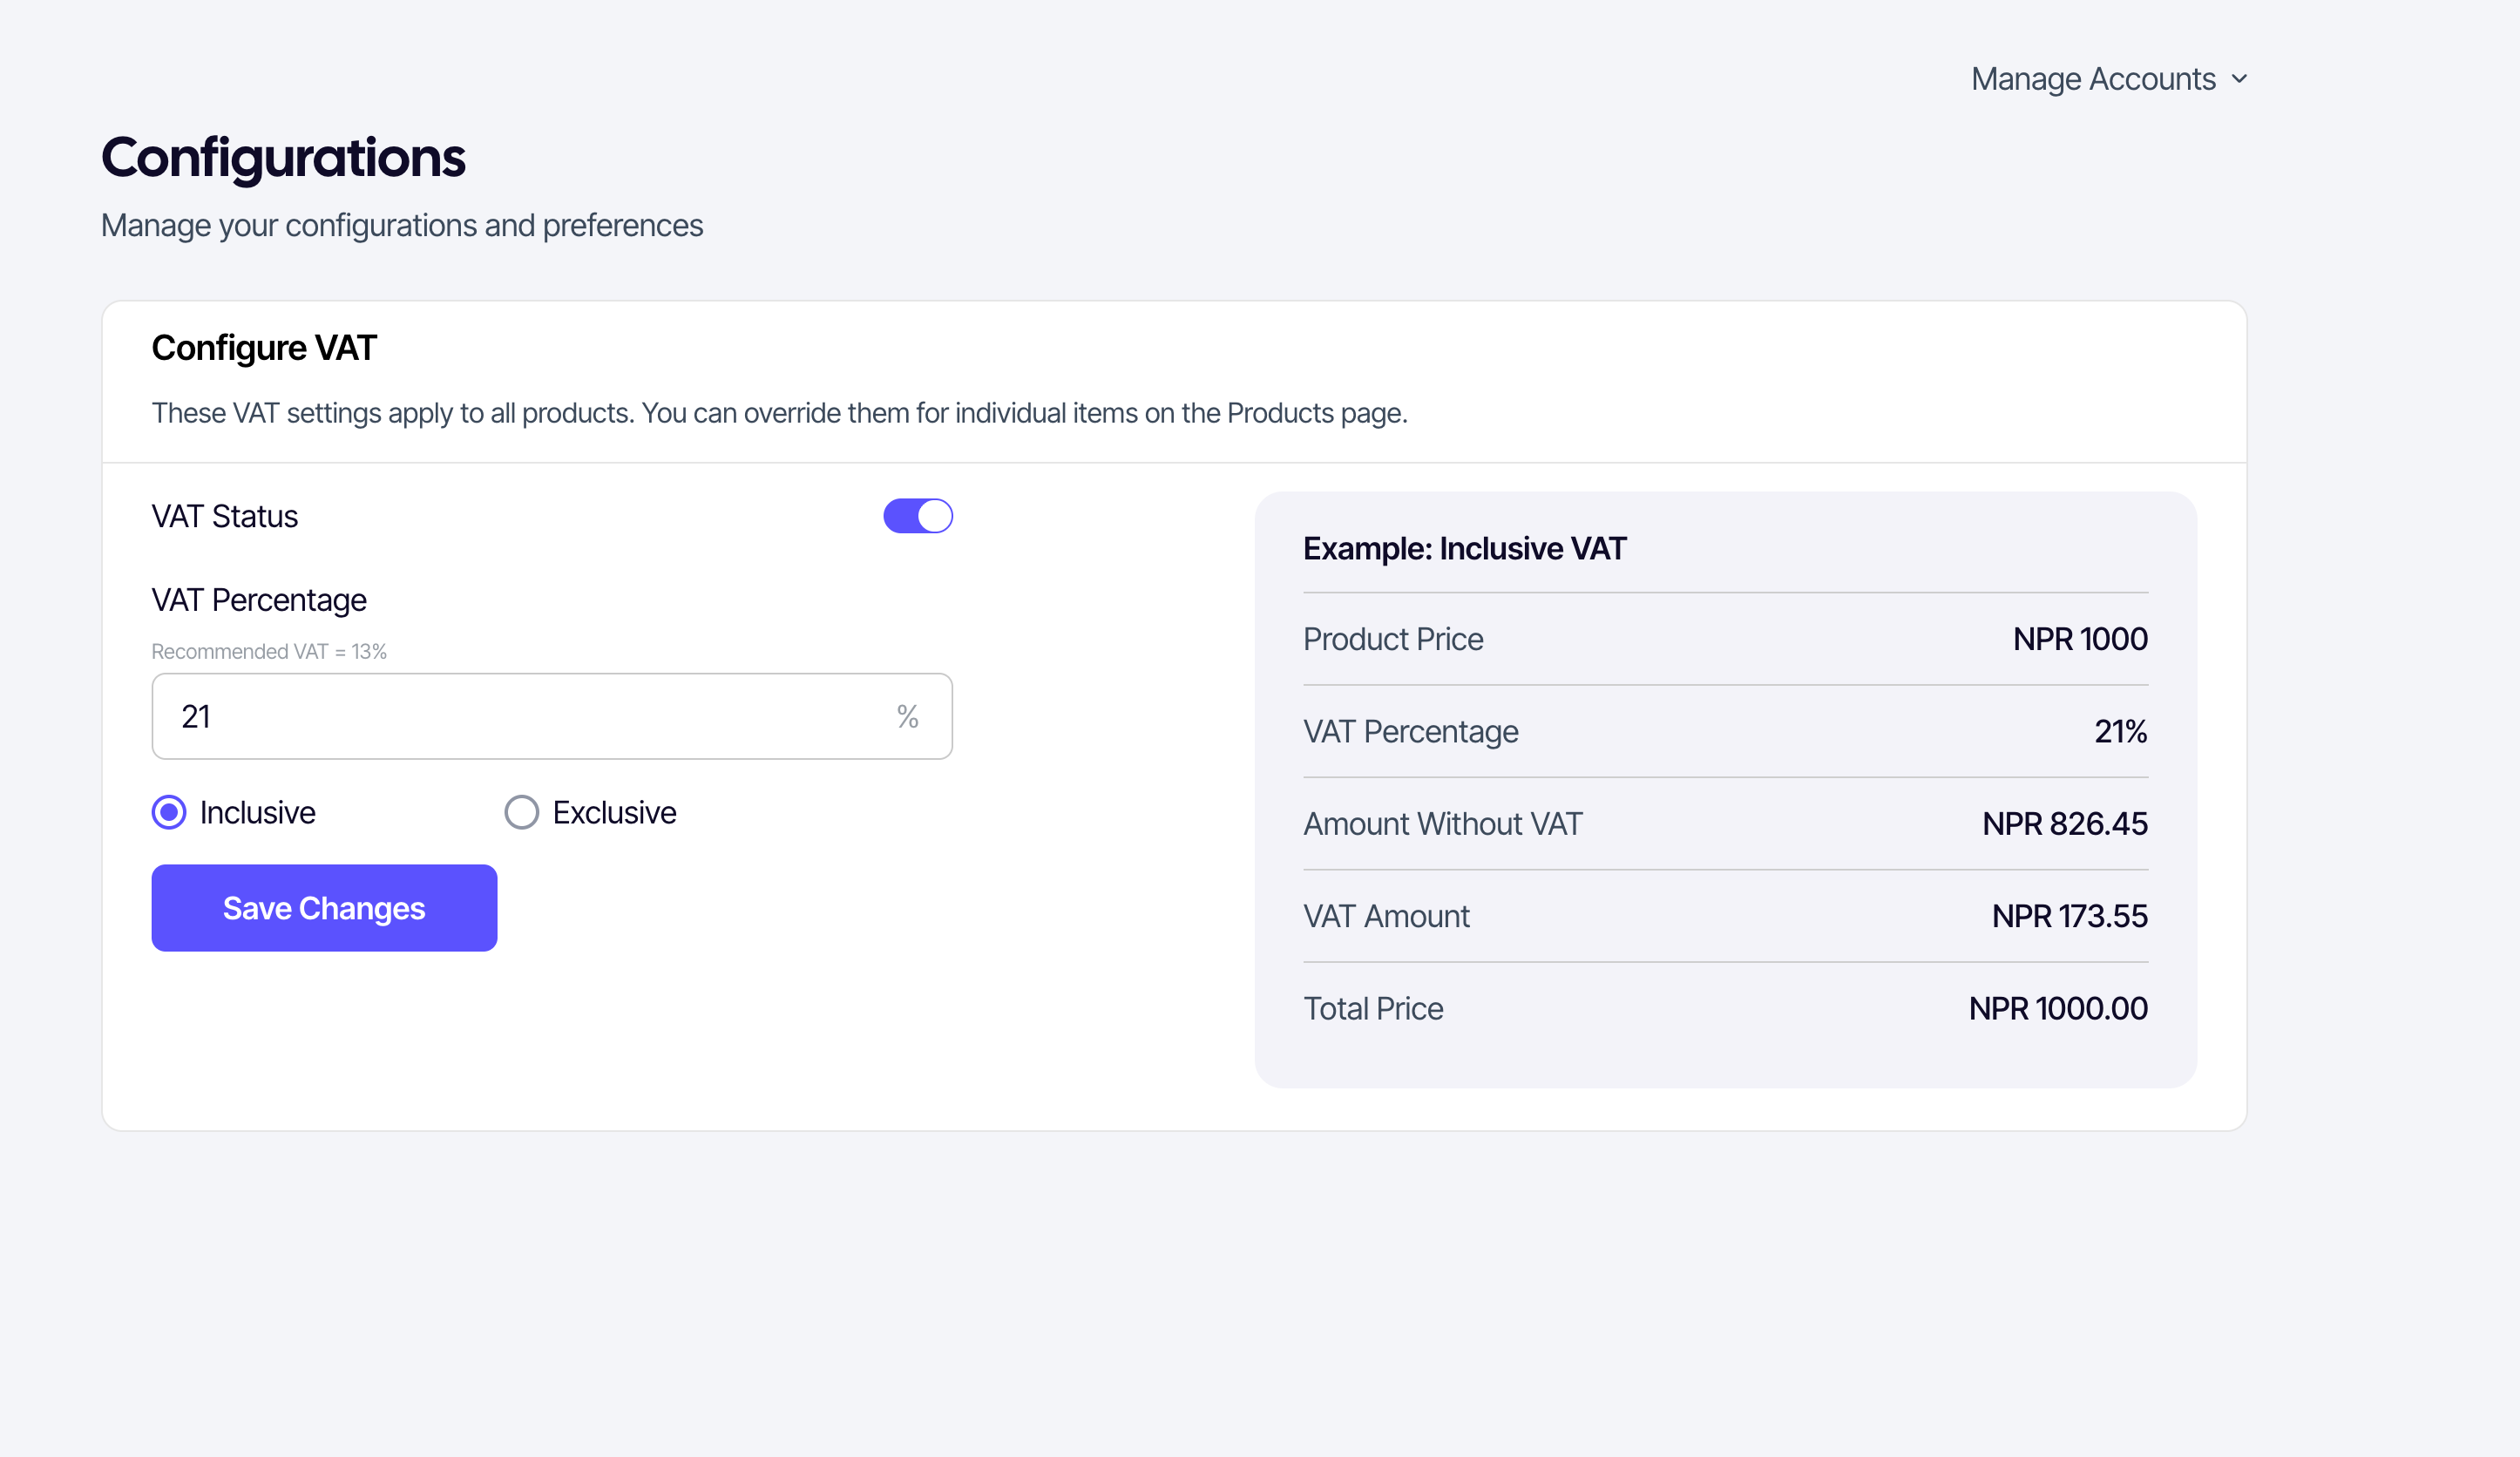
- Open Configuration → Configure VAT.
- Toggle VAT Status to on.
- Enter the VAT percentage (e.g. 13).
- Choose the VAT Type:
- Inclusive — The price you set for plans already includes VAT. SUQO will extract the VAT amount for receipts.
- Exclusive — The price you set for plans does not include VAT. SUQO will add the VAT amount on top at checkout.
- Click Save Changes.
The VAT Summary Example
When you enable VAT and enter a percentage, SUQO shows a live example on the right (or below on mobile). It shows how a NPR 1,000 product would be billed based on your chosen VAT type.
| Field | Description |
|---|---|
| Product Price | The base price (NPR 1,000 in the example). |
| VAT Percentage | The rate you entered. |
| Amount Without VAT | The base value of the service. |
| VAT Amount | The calculated tax component. |
| Total Price | What the customer actually pays. |
How it appears for customers
When VAT is enabled, the public product page shows the price excluding/including VAT and shows the breakdown of the price and the VAT amount on the next screen. The total at checkout is the sum, and receipts include both lines for the customer's records.
Turning VAT off
Toggle Enable VAT off and save. New checkouts won't include VAT; past transactions are not modified.
Tax ID: The tax ID (PAN/VAT) shown on receipts is set during signup and lives on your business profile. Contact support to change it.